こちらは Algolia Advent Calendar 2020 22日目 の記事になるかもしれません。
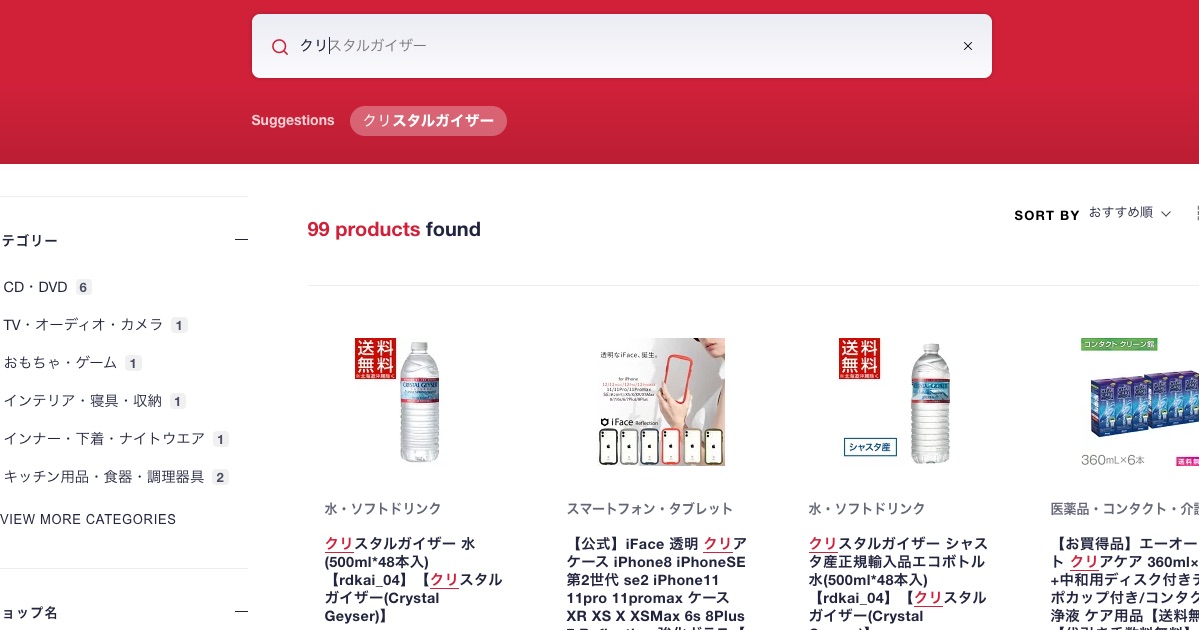
Predictive text suggestions は、検索ボックスの中でユーザーの文字入力に直接サジェストを補完するものになります。これによって、ユーザーはより早く目的のものを探し当てることができ、また、人気のある検索クエリを元に新たな検索の着想をえることができます。
Predictive text suggestionsの実装
Query Suggestionsのインデックスの作成
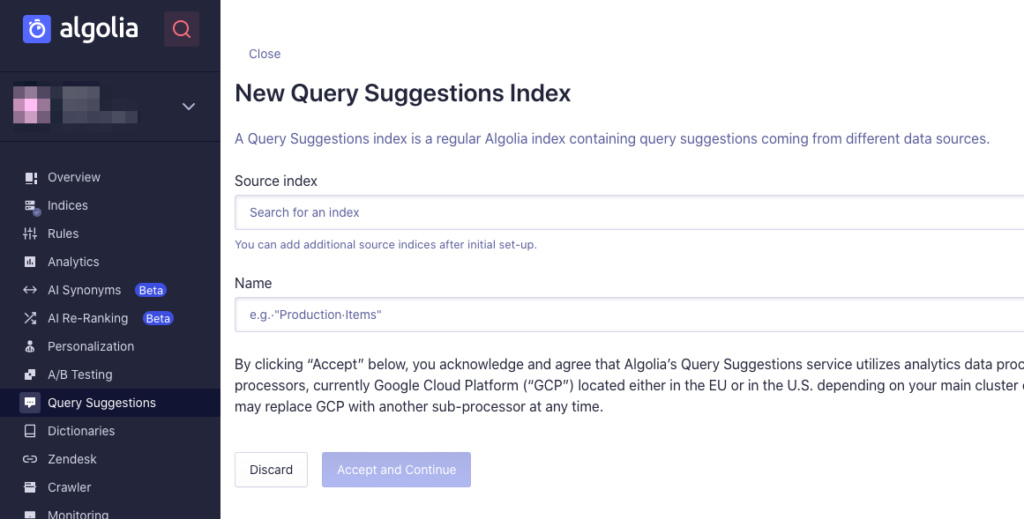
先日 AlgoliaのQuery Suggestionsについて に詳細を記載させていただきましたが、Algoliaにおいてクエリサジェスト用のIndexはDashboard上で簡単に構築することが可能です。作業としてはメインのインデックスおよび言語を設定いただくだけになります。

実装の概要
Predictive text suggestionsのフロントエンドの実装においては、search boxとpredictive boxの2つのコンテナをオーバラップさせる形となります。そして、ユーザーのキーストロークごとにクエリとしてサジェスト用のインデックスに送信します。
predictive boxはサジェスチョンインデックスの一番上のクエリの結果をクエリの更新とともに継続して表示値続けます。もちろん、検索ボックスの下に複数のサジェスチョンを表示したり、ドロップボックスとして表示することも可能です。
では、どのような流れで実装をしていくか見ていきましょう。
- まずは検索クエリを入力する部分を div タグで囲います
- サジェスチョンを表示するための2つ目のコンテナを用意します
- しっかりオーバーラップされるようにCSSを使ってsearch boxの中のポジションを微調整します
- suggestion containerのテキストの色を変更します。これによってユーザーは自分が入力したクエリ部分とサジェストされた部分を区別できるようになります
- キーストロークごとにユーザーのクエリをQuery Suggestionsのインデックスに送るようにします
- Query Suggestionsのインデックスからレスポンスを受け取るごとに、suggestions containerにユーザーが入力する文字列ではじまる検索結果を表示させるようにします。(Predictive text suggestionsはユーザーが入力した文字と同じ文字列ではじまるものでなければなりません)
実装の詳細
ここからは、Predictive Search BoxのWidgetを作成してインポートしていくような流れを想定した実装の方法をご紹介します。
まず、1.検索ボックス、2.オーバーラップさせるPredictive Box、そして、3.その他のサジェストを表示するエリアの3つのdivを返すJavaScriptのFunctionを作ります。
const renderSearchBoxContainer = (placeholder, value) => {
  return `
      <div id="searchbox">
        <div id="predictive-box" style="display: none;">
          <span id="predictive-box-text"></span>
        </div>
        <div class="search-box-container">
          <input autocapitalize="off"
            placeholder="${placeholder}"
            id="search-box-input"
            autocomplete="off"
            autocorrect="off"
            role="textbox"
            spellcheck="false"
            type="search"
            value="${value}">
        </div>
        <div id="clear-input"><i class="fas fa-times"></i></div>
        <fieldset id="suggestion-tags-container"></fieldset>
      </div>
    `;
};
検索ボックスは3つのパーツから成ります。
- search box: ユーザーが検索文字列を入力する(.search-box-container)
- predictive box: search boxをオーバーラップしトップのサジェスチョンを表示する(.predictive-box)
- suggestions tags: Query Suggestionsインデックスから返される全てのサジェスチョンを表示する(.suggestion-tags-container)
そして、search boxとpredictive boxの表示用のCSS。ゴールは
- divが完璧にオーバーラップする
- predictive boxがsearch boxの後ろに現れるようにし、ユーザーは継続してタイプを続けることができる
- predictive boxとsearch boxの文字の色を変える
.search-box-container input {
  border: none;
  border-bottom: 1px solid #cecece;
  width: 100%;
  font-size: 20px;
  background: transparent;
  padding: 0 !important;
  outline: none;
  height: 100%;
  position: relative;
  z-index: 99;
  font-family: Arial, Helvetica, sans-serif;
}

#predictive-box {
  height: 49px;
  padding: 0 !important;
  display: flex;
  align-items: center;
  position: absolute;
  border-bottom: 1px solid transparent;
}

#predictive-box-text {
  font-family: Arial, Helvetica, sans-serif;
  font-size: 20px;
  color: #a2a2a2;
}
JavaScriptのヘルパーファンクションを作ってユーザーのキーストロークを捉える
const isKey = (event, code, name) => event.which === code || event.keyCode === code || event.key === name;JavaScriptの PredictiveSearchBox クラスを作る。ここにメソッドを追加していきます。
class PredictiveSearchBox {
  // Add methods to the class in the following steps
}
PredictiveSearchBoxにコンストラクターを追加(Query Suggestions用のApp IDと検索専用API Keyとインデックスを指定して検索クライアントインスタンスを生成)
class PredictiveSearchBox {
  constructor(options) {
    Object.assign(this, options);

    this.client = algoliasearch(options.appID, options.apiKey);
    this.querySuggestionsIndex = this.client.initIndex(
      this.querySuggestionsIndex
    );

    this.maxSuggestions = 5;
    this.tabActionSuggestion = '';
  }
}
PredictiveSearchBoxのイニシャライズ処理。
class PredictiveSearchBox {
  // ...

  init(initOptions) {
    const widgetContainer = document.querySelector(this.container);

    if (!widgetContainer) {
      throw new Error(
        `Could not find widget container ${this.container} inside the DOM.`
      );
    }

    widgetContainer.innerHTML = renderSearchBoxContainer(
      this.placeholder,
      initOptions.helper.state.query
    );

    this.predictiveSearchBox = widgetContainer.querySelector('#predictive-box');
    this.predictiveSearchBoxItem = widgetContainer.querySelector(
      '#predictive-box-text'
    );
    this.clearButton = widgetContainer.querySelector('#clear-input');
    this.searchBoxInput = widgetContainer.querySelector('#search-box-input');
    this.suggestionTagsContainer = widgetContainer.querySelector(
      '#suggestion-tags-container'
    );

    this.registerSearchBoxHandlers(
      initOptions.helper,
      this.searchBoxInput,
      this.clearButton
    );
  }
}
ハンドラを追加してサジェスチョンのハンドリングや、タブでの補完、そしてキーボードのインプットを取得してクエリを投げる。
class PredictiveSearchBox {
  // ...

  registerSearchBoxHandlers = (helper, searchBox, clearButton) => {
    searchBox.addEventListener('input', event => this.updateTabActionSuggestion(event));
    searchBox.addEventListener('keydown', event => this.onTabSelection(event));
    clearButton.addEventListener('click', event => this.clear(event));
    searchBox.addEventListener('input', event => {
      helper.setQuery(event.currentTarget.value).search();
    });
  };
}
検索ボックスの入力欄に値をせていするためのsetter
class PredictiveSearchBox {
  // ...

  setSearchBoxValue = value => {
    this.searchBoxInput.value = value;
    this.searchBoxInput.dispatchEvent(new Event('input'));
  };
}
上記のsetSearchBoxValueをコールするハンドラを追加。right arrowが押された場合の処理を実装。(このTap-aheadパターンと呼ばれる実装に関しては、モバイル検索におけるオートコンプリートの3つのベストプラクティスを参照のこと)
class PredictiveSearchBox {
  // ...

  onTabSelection = event => {
    if (!isKey(event, 39, 'ArrowRight')) return;

    event.preventDefault();
    this.setSearchBoxValue(this.tabActionSuggestion);
  };
}
サジェスチョンのリストを更新(新しいレスポンスをQuery Suggestionsのインデックスから得る)するメソッドの追加。
class PredictiveSearchBox {
  // ...

  updateSuggestionTags = hits => {
    if (!this.maxSuggestions || this.maxSuggestions <= 0) return hits;
    this.clearSuggestionTags();

    hits.slice(0, this.maxSuggestions).forEach(suggestion => {
      const suggestionElement = document.createElement('button');
      suggestionElement.classList.add('suggestion-tag');
      suggestionElement.innerHTML = suggestion._highlightResult.query.value;

      suggestionElement.addEventListener('click', () => {
        this.setSearchBoxValue(suggestion.query);
      });
      this.suggestionTagsContainer.append(suggestionElement);
    });
  };
}
Query Suggestionsのインデックスを検索して、その結果を使ってpredictive boxとサジェスチョンリストを更新するメソッドを追加。クエリが変更されるたびに呼び出されます。
class PredictiveSearchBox {
  // ...

  updateTabActionSuggestion = event => {
    const query = event.currentTarget.value;

    if (!query) {
      this.predictiveSearchBox.style.display = 'none';
      this.clearButton.style.display = 'none';
      return;
    }

    this.querySuggestionsIndex
      .search({ query })
      .then(response => {
        const suggestions = response.hits.filter(hit =>
          hit.query.startsWith(query)
        );

        if (!suggestions.length) {
          this.clearPredictiveSearchBox();
          return [];
        }

        this.predictiveSearchBox.style.display = 'flex';
        this.predictiveSearchBoxItem.innerText = suggestions[0].query;
        this.tabActionSuggestion = suggestions[0].query;
        return suggestions.slice(1);
      })
      .then(this.updateSuggestionTags);
  };
}
サジェスチョンのリストをクリアするメソッドを追加。
class PredictiveSearchBox {
  // ...

  clearSuggestionTags = () => {
    this.suggestionTagsContainer.innerHTML = '';
  };
}
predictive box のサジェスチョンを消すメソッドも追加。
class PredictiveSearchBox {
  // ...

  clearPredictiveSearchBox = () => {
    this.tabActionSuggestion = '';
  };
}
全てクリアする用のメソッド
class PredictiveSearchBox {
  // ...

  clear = event => {
    this.searchBoxInput.value = '';
    this.predictiveSearchBoxItem.innerText = '';
    this.clearSuggestionTags();

    this.tabActionSuggestion = '';
    event.target.style.display = 'none';
    searchBoxInput.dispatchEvent(new Event('input'));
  };
}
最後にこれをexportして、あなたのアプリケーションでimportできるようにして実装完了。
class PredictiveSearchBox {
  // ...
}

export default PredictiveSearchBox;
ソースコード
上記で解説したソースコードはGithubの algolia / solutions / predictive-search-box-widget-demo で公開されておりますので、よろしければ是非ご覧ください。
また、Predictive Search Boxが実際に動作するデモ も公開しておりますので、アクセスして動作を確かめてみていただければ幸いです。


コメント